
This is an example of connecting a 128×64 I2C OLED display to a NUCLEO-F334R8.
Vcc – 3.3v
Gnd – Any Gnd
SDA – D14
SCL – D15
here is a picture of the OLED I used, there are many variants of this available
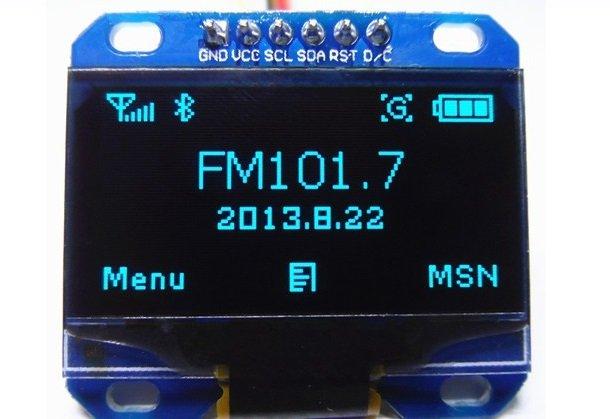
oled 12864 display
Schematics and Layout
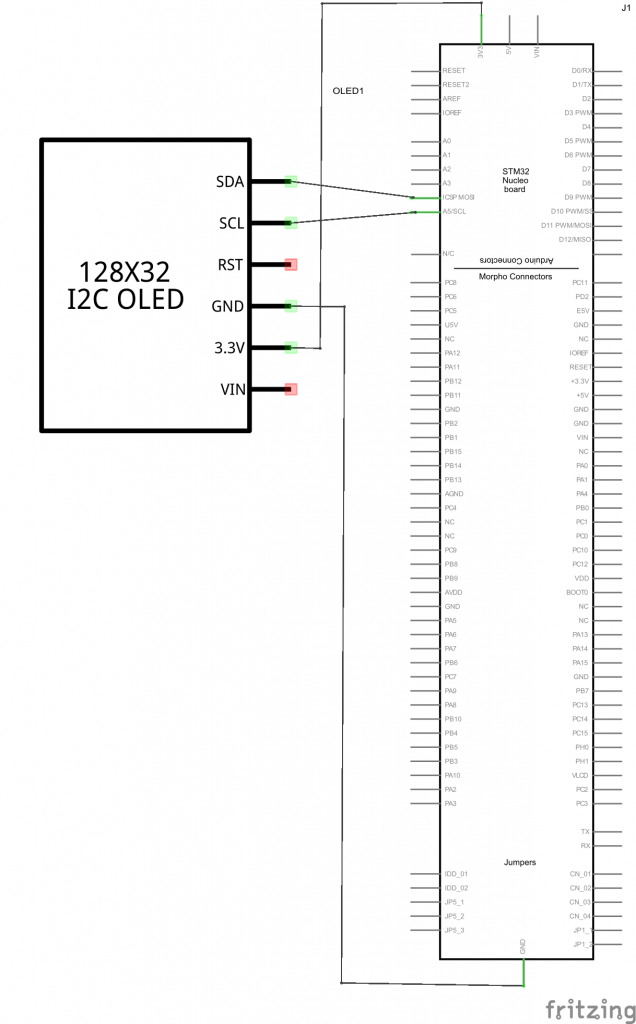
nucleo and oled schematic
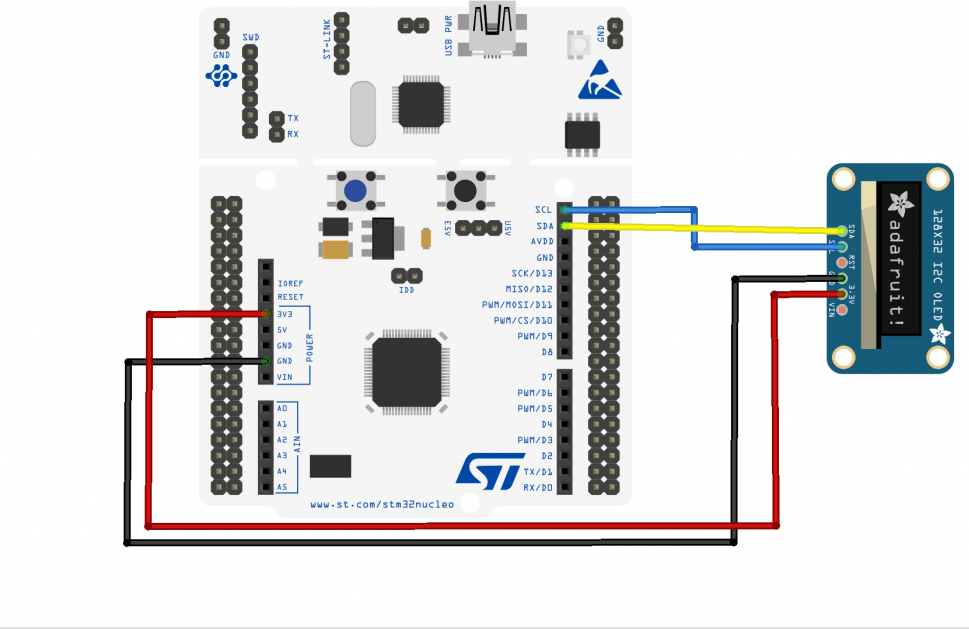
Now for the breadboard layout
Code
This example requires the Adafruit_Gfx library to be imported into your project. Since this is an I2C display and its a 128×64 I had to modify the rawHeight parameter in the Adafruit_SSD1306.h code as follows
Here is an export of the code and libraries
Adafruit_SSD1306_I2c(I2C &i2c, PinName RST, uint8_t i2cAddress = SSD_I2C_ADDRESS, uint8_t rawHeight = 32, uint8_t rawWidth = 128)
to
Adafruit_SSD1306_I2c(I2C &i2c, PinName RST, uint8_t i2cAddress = SSD_I2C_ADDRESS, uint8_t rawHeight = 64, uint8_t rawWidth = 128)
[codesyntax lang=”cpp”]
#include "mbed.h"
#include "Adafruit_SSD1306.h"

DigitalOut myLed(LED1);
I2C i2c(I2C_SDA, I2C_SCL);

Adafruit_SSD1306_I2c oled (i2c, D4);

int main()
{
int tickTime = 1000;
oled.begin(SSD1306_SWITCHCAPVCC);
wait_ms(200);
oled.splash();
oled.display();
wait(2);
while(1)
{
myLed = !myLed;
wait_ms(tickTime);
}
}
[/codesyntax]
You should see the adafruit logo on your display if everything works OK
Links
STM32 Board Nucleo NUCLEO-F334R8 STM32F334R8 STM32 Development Board Integrate ST-LINK/V2-1 Debugger/Programmer Support Arduino
