
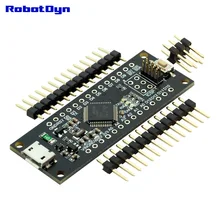
The RobotDyn SAMD21 M0-Mini represents a powerful, 32-bit extension of the Arduino UNO platform, but to small size like Micro or Nano. The board is powered by Atmel’s SAMD21 MCU, featuring a 32-bit ARM Cortex® M0 core. Compatible with Arduino Zero and Arduino M0.
The SAMD21 M0-Mini board expands the family by providing increased performance, enabling a variety of project opportunities for devices, and acts as a great educational tool for learning about 32-bit application development.
 The Zero applications span from smart IoT devices, wearable technology, high-tech automation, to crazy robotics. The board is powered by Atmel’s SAMD21 MCU, which features a 32-bit ARM Cortex® M0+ core. One of its most important features is Atmel’s Embedded Debugger (EDBG), which provides a full debug interface without the need for additional hardware, significantly increasing the ease-of-use for software debugging. EDBG also supports a virtual COM port that can be used for device and bootloader programming.
The boards are of course 3.3 volt compatible only – so be wary of this
Sparkfun have a page detailing the ARM microcontroller with a handy comparison to an ATMEGA328 – https://learn.sparkfun.com/tutorials/samd21-minidev-breakout-hookup-guide/samd21-overview
Install Arduino SAMD Boards
First, you need to add support for the board. These tools come packaged along with Arduino’s SAMD board definitions for the Arduino Zero.
To install the Arduino SAMD board definitions, navigate to your board manager (Tools > Board > Boards Manager…), then find an entry for Arduino SAMD Boards (32-bits ARM Cortex-M0+). Select it, and install the latest version.
Installing the Arduino SAMD boards
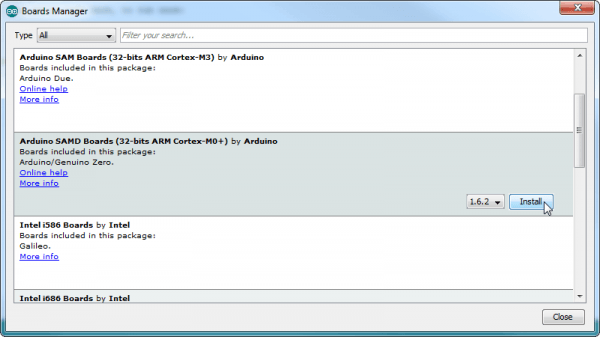
arduino board install screen
Downloading and installing the tools may take a couple minutes depending on your network speed.
Once installed, Arduino-blue “Installed” text should appear next to the SAMD boards list entry.
In the Arduino IDE I selected Arduino MO and my device was on COM6
Code
Once again the blink sketch is where we go to test everything is working, this was compiled and uploaded and the on board LED flashed as expected
[codesyntax lang=”cpp”]
// the setup function runs once when you press reset or power the board
void setup() {
  // initialize digital pin LED_BUILTIN as an output.
  pinMode(LED_BUILTIN, OUTPUT);
}

// the loop function runs over and over again forever
void loop() {
  digitalWrite(LED_BUILTIN, HIGH);   // turn the LED on (HIGH is the voltage level)
  delay(1000);                       // wait for a second
  digitalWrite(LED_BUILTIN, LOW);    // turn the LED off by making the voltage LOW
  delay(1000);                       // wait for a second
}
[/codesyntax]
Links
Those folks at Sparkfun have a version and here are the schematics and files for making the board – https://github.com/sparkfun/SAMD21_Mini_Breakout
You can pick up the variant I bought which works perfectly for only $12 – a nice price in my opinion for an ARM micro board
